Friday, November 21, 2014

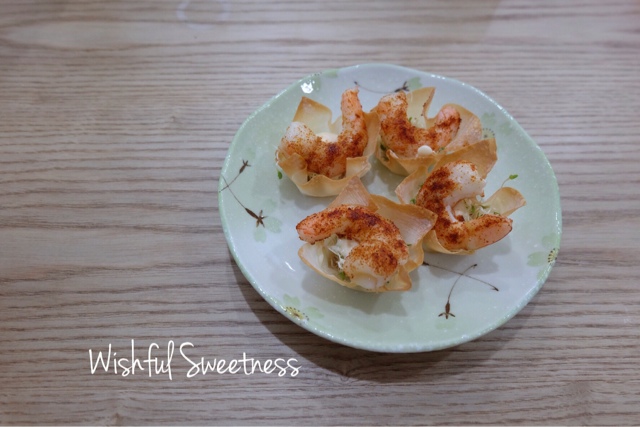
Chili Lime Shrimps in Wonton Cups

In a group chat where I invited my fellow mountain climbers and a professional salsa dancer over to my place ....

Dalyn: Stay for dinner? I can order pizza, haha
Pauline: ok can also, but pizza? LOL
Dalyn: What else huh? 

I thought to myself, "Didn't Pauline served us pizza she bought from supermarket and warmed it in the oven?!?!" Nevertheless, my pretty friend offered her help with simple dishes using oven. Pauline, an experienced hostess, gave me fantastic ideas on wonton cups and cheese platter. And so I searched 'wonton cups' in Pinterest and chanced upon chili lime shrimps in wonton cups. This has to be it! My favourite seafood - shrimps. 


I decided to have a go at the wonton cups before the Party. Just when I wanted to use the oven, I realised that the racks were still sealed in the box for months! Well, as I typed this, I recall that I have another appliance silently calling out for me in its box for weeks. 

Photo credit to Adrienne

Alright, let's go back to the chili lime shrimps in wonton cups. This is what the post is really about. Wonton cups are easy to prepare. They get snapped up fast. That one-bite madness, and these little appetizers made it to my to-prepare dish for guests. Chili lime shrimps in wonton cups, yet another thumbs-up dish by my guests. 


For past two weeks, I had prepared countless wonton cups - mushroom and cheese, crabmeat rangoon and cheesy sausages. 

Trust me, you'll love these!


Chili Lime Shrimp in Wonton Cups

Yield: 24 shrimp cups

24 wonton wrappers
2 tablespoons olive oil
24 medium shrimps, peeled and deveined
1/2 tsp salt
1 tsp crushed red pepper
2 limes
1/2 cup alfalfa sprouts
3 tbsp sour cream

1. Heat oven to 170 degrees C.

2. Prepare wonton shells. Lightly brush wonton wrappers and then arrange them in 24 mini muffin/cupcake cups. Bake until golden brown and crisp, 5 to 7 minutes. 

3. Prepare the shrimps. Toss the shrimp with 1 tablespoon of olive oil, salt, 2 teaspoons of lime zest and crushed red pepper. Bake shrimp until opaque throughout, 5 to 8 minutes. 

4. Assemble shrimp cups. Fill each wonton cup with a few alfalfa sprouts, a small dollop of sour cream, one shrimp then top with a spritz of lime juice. 



Tuesday, November 18, 2014

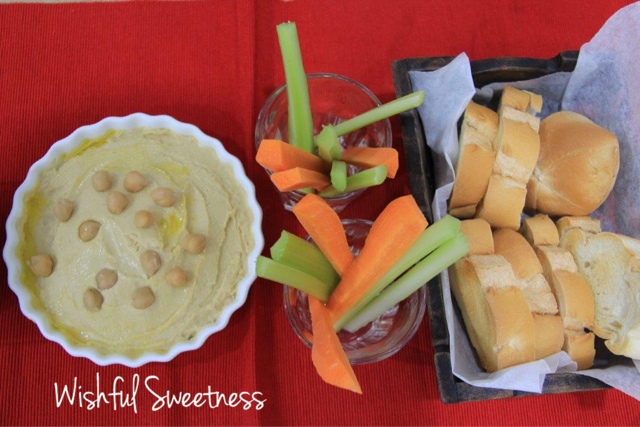
Jamie Oliver's The Best Hummus Recipe

I always dream to create a beautiful space to hangout, host friends, cook meals, drink tea, read books. And be pretty hostess. 


It didn't take me long to tackle this challenging task from the fail-proof steamboat where everyone gets to enjoy the food, which has been briefly cooked in hot broth to appetizers & cheese platter to whole day challenge resulting in my first sausages platter and cranking out chilli lime prawns in wonton cups for friends since. 


Jamie Oliver's basic hummus recipe receives everyone's LIKES! That creamy dip that hails from the Middle East, has a reputation as a clean, healthy food. It deserves it. All the main ingredients are super food in their own right. It's got chickpeas, taihini, garlic, lemon juice and olive oil in most traditional versions. 

Hummus isn't just for dipping. It makes a great sandwich spread, too. Seeing a 10 year-old Zi Han spreading thick layers on his baguette and kept praising the hummus. (Confidence booster for moi!) Try it instead of mayonnaise. You'll get more protein and fiber for half the calories you would get from mayo. Hummus adds 1 gram of flat to your lunch box, compared to 5 grams for regular mayo.

Photo credit to Adrienne

Why I love this recipe. When I first figured out how to make my own hummus, I was pleasantly pleased at how easy and fast it is. With just 6 ingredients, you can really make creamy smooth hummus at home and yes, I really think it's better than store-bought. 


Two things: First, I use canned chickpeas, which is much quicker than using dried. Adrienne and Florence swear by buying chickpeas from Little India, soaking and steaming dried chickpeas but I'm just not that patient and I love canned chickpeas means I can enjoy hummus in 10 minutes. Second, the recipe calls for tahini, a creamy paste made from sesame seeds. You can easily find tahini in larger supermarkets.


Basic Hummus recipe
(Adapted from Jamie Oliver)

I use half of Jamie's recipe and is good for 7 pax as a started and paired with baguette. 

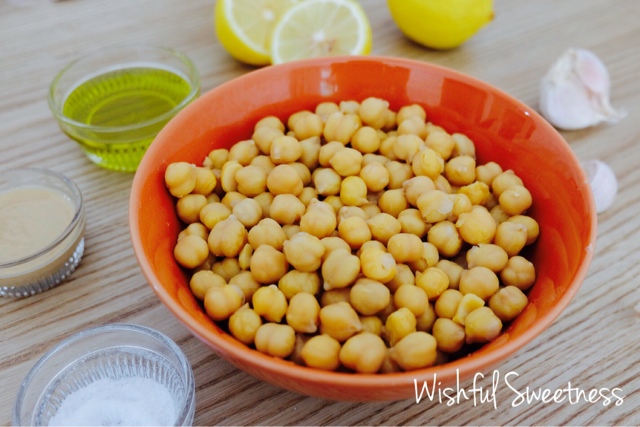
1 x 400g can of chickpeas (reserve the liquid and a few chickpeas for decoration)
2 tsp tahini
1 garlic cloves, crushed
1/2 tsp crushed sea salt
3 tbsp quality extra virgin olive oil (plus extra for drizzling)
1-3/4 tbsp freshly squeezed lemon juice
paprika (optional)
coriander or parsley leaves (optional)


Rinse the chickpeas in cold water and tip into the food processor. Add the tahini, crushed garlic, salt, lemon juice, and three and one half tablespoons of the reserved liquid from the can. Turn on the food processor and slowly pour in the oil while it runs. 

When the mixture is fully combined and smooth, tip it into a serving dish. Drizzle with some extra virgin oil and decorate with a few whole chickpeas. Sprinkle with paprika and finely chopped or parsley leaves, for colour. 

Store hummus in airtight container, up to 7 days in fridge. 

Wednesday, November 12, 2014

Triple Chocolate Kahlua Cheesecake


You may have noticed that I have been quiet in my blog and Facebook Page in the past few months. In reality, last couple of months have been exciting and crazy, following getting my own space, moving and travelling to Central & Eastern Europe. 

I'm grateful that my home is transformed from a near naked place to a beautiful home! (Alright, I'm biased!) I'm proud to present my humble kitchenette. The initial kitchenette is no more than a miserable pantry. I built a full height cabinet with my first ever built-in oven. Oh, did I mention that the gorgeous flamenco apron is a gift from my friend who bought in Spain? 


Now that I am settled into my new place, I can start cranking out baking again. I miss the feel of the flour, the sound of the mixer, and of course, the smell of the delectable final product. 

Let's talk about this cake. This chocolate cheesecake is a real showstopper. It has three chocolate layers, starting with a sandy textured chocolate crust made with crushed Oreo cookies. The chocolate cheesecake filling folds dark chocolate into a delicious mixture of cream cheese, sugar, eggs, coffee powder and Kahlua (coffee liquor). It's sinfully rich and chocolately. Since this cheesecake is all about chocolates, I covered it with a layer of chocolate ganache and topped with ferraro rocher chocolates. 


TRIPLE CHOCOLATE KAHLUA CHEESECAKE
(adapted from here, makes one 8" cake)

Crust
285g Oreo cookies
25g sugar
5g cocoa
pinch of salt
85g unsalted butter, melted

Prepare the crust
1. Prepare the 8" springform so that no water leaks into it while baking. Place a large 18-inch by 18-inch square of aluminum foil on a flat surface. Place the springform pan in the middle of the foil. Gently fold up the sides of the foil around the pan. Make sure to do this gently so that you don't create any holes in the foil. If there are any holes, water will get into the pan and ruin the crust. Press the foil around the edges of the pan. Place a second large square of foil underneath the pan and repeat, gently folding up the sides of the foil around the pan and pressing the foil against the pan. Gently crimp the top of the foil sheets around the top edge of the pan.

2. Preheat oven to 175°C (or 155°C for a fan-forced oven), with rack in lower third of oven. Pulse the above ingredients (except for the butter) in a food processor or blender until finely ground. Add the melted butter, pullse a few more seconds to combine. 

*Tip: If you don't have a food processor or blender, you can throw the cookies into a large food storage bag and give it a good whack with a rolling pin or a heavy duty pot. You'll get out a lot of anger and stress that way. 

3. Put all the crumbs in the sides and bottom of the springform pan. Gently press down on the crumbs using spatula, until the crumbs are a nice even layer at the bottom of the pan, with a rise along the sides of the pan. Be careful, as you do this, as not to tear the aluminum foil. Place in the own for 10 minutes. Remove from the oven and let it cool. 


Filling
200g dark chocolate, chopped (I used 70% cocoa)
1 tsp coffee powder
680g cream cheese, room temperature
160g sugar
23g cocoa
3 large egges
1/2 tsp vanilla paste
3 tbsp kahlua (or other liquor of your choice)

Make the fillings

4. Combine chocolate and coffee powder in a bowl. Place over double boiler over low heat, stirring once in a while, till the chocolate is smooth and melted. Set aside. 

5. Cut the cream cheese into chunks and place in the bowl of an electric mixer, with the paddle attachment. Add the sugar and cocoa powder and beat till well combined. Remember to scrape down the sides of the mixer bowl, and scrape up any thicker bits of cream cheese that have stuck to the bottom of the mixer that the paddle attachment has failed to incorporate. Add the eggs, one at a time, beating for one minute after each addition. Add the vanilla and kahlua, beat for another minute or so till combined. Add the melted chocolate, beat for another few minutes till mixture is homogeneous. 

Cook the cheesecake

6. Place the foil-wrapped springform in a large, high-sided pan. Prepare 2 quarts of boiling water. Pour the cream cheese filling into the springform pan, over the cooled  crust. Smooth the top with a rubber spatula. Place the roasting plan with springform pan in it, in the oven, on the lower rack. Carefully pour the hot water into the roasting pan (without touching the hot oven), to create a water bath for the cheesecake. Pour until the water reaches halfway up the side of the springform pan, about 1 1/4 inches. (Alternatively you can add the boiling water before putting the pan in the oven, whichever is easier for you.) Bake at 175°C (or 155°C for fan-forced oven) for 1 hour.

Water bath for Cheesecake
Pour hot water till halfway up the side of springform pan


7. Turn off the heat of the oven and let the cake cool in the oven for 15 minutes. 

8. Crack open the oven door, 1-inch and continue to let the cake cool in the oven for another hour. This gentle cooling will proven the cheesecake surface from cracking. 

9. Remove the springform pan from the oven and allow to cool on a wire rack completely. 

10. Cover the cooled cheesecake with foil, so that it doesn't actually touch the cheesecake. Chill in the refrigerator for a minimum 4-hours. 

Topping
65ml (1/3 cup minus 1 tbsp) whipping cream
15ml (1tbsp) low fat milk
80g dark chocolate, finely chopped

11. Combine cream and milk in a small saucepan, bring to simmer over medium-high heat. Add dark chocolate, remove from heat, stir until smooth. Spread over chilled cheesecake and topped with Ferraro Rocher chocolates. Refrigerate until just set (45 minutes to an hour). 

Serving
12. Cut into wedges with a hot knife and serve immediately.